Homemade Vegetable Broth

Fall makes me think of soup and what better way to make homemade soup, than to start with some homemade broth?

Vegetable broth can be used in soup, casserole, chili, or even as a broth over meat you’re doing in the crock pot to add a depth to the flavor.

Marie’s Vegetable Broth

3 medium onions

3 carrots

2 stalks of celery

3 medium russet potatoes


In a large pan, place 2-3 tablespoons of olive oil.  Dice all vegetables and add to warm pan.  Add salt and pepper to taste.  Saute all vegetables until onions are translucent.

Marie's Homemade Vegetable Broth


Transfer vegetables to a slow cooker.

Marie's Homemade Vegetable Broth


Add water to the rim.  Add more salt and pepper.  Cook on low for 24 hours.

Marie's Homemade Vegetable Broth

At the end of 24 hours, you should have a rich broth.  I like to either mash or emulsify the vegetables and leave them in the broth.  Why waste the nutrients?

Now you have some homemade vegetable broth to enjoy!   I freeze mine in 2-3 cup portions.  Sometimes, I will also use the large muffin tins to freeze broth.  They measure about 3/4 cup, but it’s easy to freeze them in the tins and then transfer them to a freezer bag.  This is especially helpful if you only need a small amount!

Hope you’ll make some veggie broth and please comment on how you make your own!

BENEFITS:

  • Homemade always tastes better than store bought
  • No preservatives
  • Fun using the veggies you’ve grown
  • Great way to make your veggies stretch a little farther

I made 4 quarts of broth with onions, potatoes, carrots and celery that cost me $3.75.  (If you grew your own, the cost would be minimal!)  Store bought vegetable broth is about $2.50 per quart or $10.00.

MONEY SAVED:  $6.25!!

🙂

Homesteading Reference Library

A Physical Reference Library

Few things beat experience, but a good reference library can be a good back-up for the times you need a little more information.

I love reading and have my Kindle filled with all sorts of eBooks.  I’ve read dozens of books on gardening, homesteading, and husbandry, but  it soon became clear to me that certain books were going to be needed in their physical form, for easy referencing.

Thus, began my reference library.

Homesteading Reference Library

As the name of my blog implies, I am a frugal person, so I wasn’t about to pay full price for these books and I also didn’t care if they were used.  I researched the books I wanted and made a wishlist on Amazon, so I wouldn’t forget the titles. From there, I would periodically check Amazon and eBay for those titles to see if anyone was selling them used, at reasonable prices.

It took me some time and a lot of patience, but I did score all of the books I wanted for what I consider really good prices.  Even with the shipping.  I bought a used copy of an older edition to save even more money.  I’ve been very pleased with the used condition of the books and I know the information contained within them will be valuable to me for many years to come.

Here are some of my favorites:

Homesteading Reference Library

This is an instance where I’m saving money and making a good investment.

I’m paying for an education. 🙂

BENEFITS:

  • Information from accredited sources
  • Background knowledge to help you avoid mistakes
  • Know-how that will help you live better
  • Cheap education

My used books have been found at thrift stores (thanks to my husband), on Amazon and eBay.  Even when I have to pay a bit more for one, it’s ok, because I’ve gotten others for only $1.00.  It all evens out.

If I had gotten all these books new, it would have cost me $345.57.  I spent $56.00!

MONEY SAVED: 289.57!!

🙂

Don't Stress Over the Mess

Don’t Stress Over the Mess

It seems like we run ourselves ragged.

We try to do it all.  Hold a job, raise kids (or fur-babies), clean the house, make appointments, do the laundry, cook meals, fix the car, mow the lawn….the list goes on and on.

We stress ourselves out about things that we perceive have to meet a standard.

Think about it:  If someone drops by unexpectedly and your house is a mess, would you “die of embarrassment”?  Is that embarrassment because of what they will think?  Why does their judgement of you matter?  Essentially, you’re trying to keep your house spotless for someone else, who may or may not stop by, and who’s opinion of you shouldn’t matter.  LOL  Kind of nuts, right?

As I’ve gotten older, I’ve gotten a lot less “fussy” about how my house looks.  I guess I feel that if someone drops by and doesn’t like how I keep house, they don’t need to come over.  Plus, the people who are invited over, know us and know we’re pretty laid back and that they should probably expect the house to look lived in.  (Especially, with 2 big dogs)

It’s all in perspective and how comfortable you are in your own skin.

For example…

The house is messy:  Hubby and I can pick up and put away what we need to and then sit down and enjoy each others company.

There are muddy dog prints on the floor:  If it’s rainy and things are going to be muddy for a few days, I don’t obsess about them.  Besides, seeing their cute paw prints makes me think about how much joy they bring to our lives.

There are dirty dishes in the sink:  Sometimes after working and making dinner, the thought of doing dishes goes over like a fart in church.  Relaxing and watching a TV show with my honey sounds like a better idea.  Dishes will still be there tomorrow.

I’m certainly not advocating being a slob, I’m just saying it’s better to slow down and enjoy the people around you first, and then do the work according to your own standard.

Life is less stressful that way!

Don't Stress Over the Mess


🙂

Saving Money on Razors

Saving Money on Razors

A couple months ago, I was having a conundrum.

I was down to my last razor and needed to get more.  The cost of disposable razors makes me furious and the thought of adding more items to the landfill makes me crazy.

It was time to stop and think of an alternative.

I thought back to my teenage years and remembered my dad giving me one of his old safety razors.  A metal safety razor and a box of double edge razor blades will last for years.

That’s it!  A perfect solution!

Saving Money on Razors

I use the blades until they don’t comfortably shave anymore, then they get transferred to a utility razor blade holder for odd jobs around the house and garage.  When they’ve outlived their usefulness, they will be put in a can and turned in to a recycling center for hazardous materials.

I also found a recipe for Homemade Shaving Cream that I really like:

1 cup olive oil

1/2 cup honey

1/2 cup Castile soap

Just stir it up and put into a pump bottle or jar.  You can also add a few drops of essential oils to make it smell nice!

I’ve been happy with my decision to switch to safety razors and I would recommend you give it a try.  🙂

BENEFITS:

  • Saving money
  • Keeping items out of the landfill
  • Using shaving cream without chemicals
  • Multi-purposing razor blades

A nice safety razor costs about $20.00 and a box of 100 razor blades costs around $9.80.   A decent, disposable razor costs an average of $3.00 each.  To buy that many disposables would be $300.00, but I only spent $29.80!

MONEY SAVED:  $270.20!!

🙂

Left-overs

My Four Meal Continuum

I hate throwing food away.

Left-overs should be reheated, frozen or used as part of a new meal.

The last option is what I’m focusing on this time; using left-overs as part of a new meal and adding just a couple of items in order to use everything.

(This isn’t the healthiest example, but it sure was delicious!) 😉

It started out like this:

Meal # 1:   Tacos.  I made a pound of taco meat. (Since I had all the ingredients for tacos, there was no additional money was spent.)  A pound of meat was way too much, so I froze half of it, like I discussed in Saving Money With Big Batch Cooking and Baking.   What didn’t go into the freezer, I put in the fridge and the next night, we had…

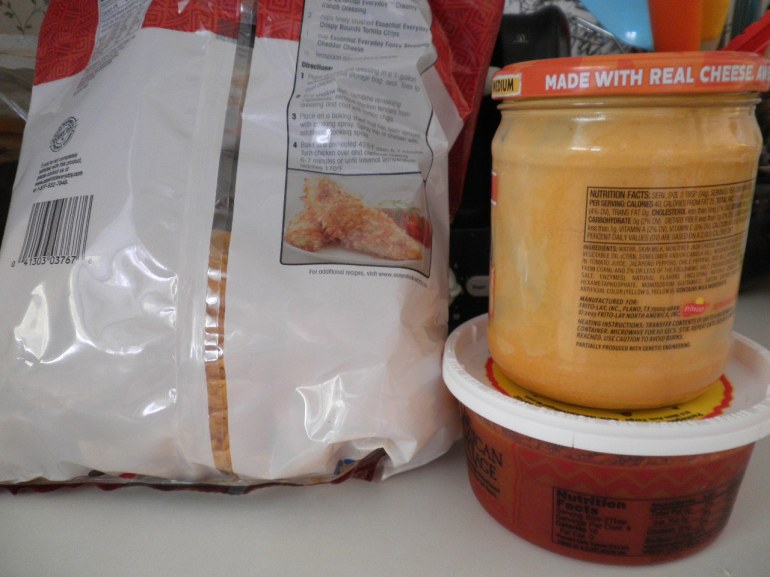
Meal #2:  Nachos.   We made a big plate of Nachos Supreme with cheese, taco meat, onions, and peppers.  I bought some nacho cheese and chips. ($5.00)  Now on to…

Meal #3:  Nachos again.  Because Nachos Supreme is that good!  But, we still have chips left.  So…

Meal #4:  Chips and hot sauce.  Bought hot sauce ($3.00)  This is more of a snack than a meal, but we love chips and hot sauce and it’s a good way to use up those chips!  Any hot sauce that’s left over can be added to a chili or soup recipe.

There you have it!  For an additional $8.00, we had 3 extra meals for 2 people.  Those extra meals cost us just $1.33 per person.  Plus, we didn’t waste anything!

BENEFITS:

  • Using left-overs in a delicious way
  • Not wasting any food
  • Using food money wisely

Assuming that the average home cooked meal is around $5.00 per person, we were able to stretch those dollars and save some money!  (3 meals x $5.00 per meal = $15.00 x 2 people = $30.00.)  / (3 meals x $1.33 per meal = $3.99 x 2 people = $7.98.)

MONEY SAVED:  $22.02!!

🙂


Vintage Cooker

Save Money With Big Batch Cooking and Baking

On the practical side of cooking and baking, it just makes sense to do big batches.

You’ll have a messy kitchen to clean up either way, so why not double or triple the recipe and end up with enough left-overs to put in the freezer for those busy days when you don’t have time to cook a meal?

Vintage Cooker

My trusty, vintage Westinghouse cooker

One advantage of big batch cooking is taking advantage of good sales.  Especially good sales on meat, which can save you a ton of money.

Another advantage of having quick meals in the freezer, is that it re-routes that urge to stop for fast food!

We have a few favorite “big batch” meals that always freeze well and taste just as good out of the freezer as they do the day they’re made.  (Sometimes, better)

Our list includes: chili, spaghetti sauce, soup, broth, beef burgundy, and lasagne.

We also love our baked goods, so those big batches include: cookies, pies, muffins, and breads.

Whatever your family favorites are, they can probably be made in a large batch and frozen.

Speaking of favorites, I’ll share our favorite spaghetti sauce recipe.  I’ve never found a better one!  This is the recipe that I will make in triple batches and cook in that nice, vintage cooker pictured above.

Favorite Spaghetti Sauce Recipe

And for big batch baking, I will share the link to our delicious: Chocolate Zucchini Bread Recipe

My Chocolate Zucchini Bread Recipe

BENEFITS:

  • Having ready made meals in the freezer
  • Taking advantage of sales on ingredients
  • Cooking once, enjoying many times
  • Home cooked, quick meals instead of fast food

The average American spends $1200.00 per year on fast food.   Let’s be conservative and say that the ingredients for these quick freezer meals would cost half that amount.

MONEY SAVED:  $600.00!!

🙂

Yarn Slipper Booties

Make Your Own Yarn Slipper Booties

Every year when there is a nip in the air, I start thinking about knitting more slipper booties for the winter!  I make myself 3 new pairs every fall and enjoy wearing them throughout the fall and winter.

I have a set of knitting looms and I use the smallest loop to make a basic tube-type slipper that I wear over my socks in the winter, to keep my feet nice and toasty warm.

Yarn Slipper Booties

Yarn can be expensive, but if you check the thrift stores on a regular basis, you can usually find some pretty good buys.  I like finding full skeins of yarn, but I will also buy left-over balls of yarn in varying sizes.  All of it works and it makes some wonderfully beautiful patterns.

Yarn Slipper Booties

Yarn Slipper Booties

For my super warm booties, I use two skeins of yarn, so I’m knitting two strings at once.  I just keep going around the loom until the slipper looks big enough, then tie it off and start on the next one.  For the second slipper, I just compare the size to the first one.  Nothing fancy, just warm!

BENEFITS:

  • Making something for yourself or others
  • Using what you have on hand
  • Saving money
  • Leisurely pastime that is also benificial

Hand made booties on Etsy are around $20.00 per pair.  I make mine with thrift store yarn that I get for $1.00 per skein.  I don’t count my time, because it’s an enjoyable hobby that I do for relaxation.

MONEY SAVED:  $18.00 x 3 = $54.00!

🙂

How to Make a Re-Purposed Clothespin Bag

I remember, as a child, hanging clothes on the clothesline and watching them flutter and whip in the wind as they dried.  I would run between the rows of clothes, enjoying the fresh smell and trying to catch them as they tossed back and forth in front of me.  The same fresh smell would lull me to sleep that night as I laid snuggled between the crisp sheets.

Make a Re-Purposed Clothespin Bag

Remembering how wonderful line dried clothes smell and feel, made me want to have a clothesline again.  Since I’m planning on getting one, I thought it would be fun to make a special clothespin holder.

I went looking around the house for something that would work and it dawned on me that the simplest solution would be to make one out of a shirt!

I found an old cotton blouse.  It’s like what my mom and grandma use to wear, and was from about the same time period as the photo above.  (More memories!)

Here’s how I did it.

Make a Re-Purposed Clothespin Bag

How to Make a Re-purposed Clothespin Bag:

  • Find a sleeveless shirt and turn it inside out.
  • Cut it off about half way up
  • Sew it straight across.
  • When you turn it right side out again, hang it on any standard hanger and fill it with your clothespins.
  • You can access clothespins from the top or the sides!
  • To wash it, just take it off the hanger and dump your pins out.

How much easier can you get?

BENEFITS:

  • Re-purposing something you already have
  • Making what you need
  • Adding your own style
  • Making something that gives you fond memories

Hand made clothespin bags average about $20.00. Since I shop in thrift stores, I had gotten this blouse for $1.00!

Money Saved $19.00!!

🙂

101-uses-for-salt

101 Uses for Salt

101 Uses For Salt

As you may or may not know, we are antique and collectible dealers.  Every once in a while we’ll come across something from the past that is very interesting and is still useful today.  My hubby bought a bunch of old pamphlets and I wanted to share one of them with you.  It is from 1926, has beautiful illustrations and helpful information on the many uses of salt.

I’m putting the entire pamphlet on.  Since it’s from 1926, I’m guessing I’m not infringing on any copyrights.

Since salt is still cheap, if it has 101 practical uses, why not make the most of it?

Some of the uses are pretty standard, but there are a few that surprised me.  Please use your best judgement in trying any of these, remembering that things are very different now, than in the 1920s.

Hope you enjoy the pamphlet from 1926 and that you can find a few good tips to use!

101-uses-for-salt

101-uses-for-salt

101-uses-for-salt

101-uses-for-salt

101-uses-for-salt

101-uses-for-salt

101-uses-for-salt

101-uses-for-salt

Benefits:

  • Salt is cheap
  • Using one simple ingredient in may different ways
  • Discovering new ways to use something you always have on hand

MONEY SAVED:

I’m not sure how to count the savings on this one.  However, in a year’s time, with 101 uses, I bet you could save $101.00!!

🙂

How to Freeze Horseradish

How to Freeze Horseradish

I LOVE horseradish.  🙂

I love the look of the plant, the smell of the root and especially the taste!  Every autumn I can hardly wait to dig up a big chunk of the root and prepare it for freezing.

When we bought our home, I noticed some huge, strange looking plants in the corner of the lot, but I wasn’t sure what they were.  As always, I asked my daughter, who identified them as horseradish.  It took me a while to get brave enough to dig some up and use it, but once I did, I was hooked!

I harvest the root in the fall, after frosts have damaged the leaves.  (Always leave enough of the root so it can continue to grow.)

All I do to prepare horseradish for freezing, is: scrub it, peel it, and grate it.   It sounds deceivingly easy.

How to Freeze Horseradish

How to Freeze Horseradish

How to Freeze Horseradish

If you have ever grated horseradish, you know that you would be wise to employ as gas mask.  I  took the reckless route, grating the root by hand, in several short intervals, coming back to it when my eyes weren’t watering profusely and I could see clearly again.  My final prize being a nice pile of horseradish for the winter and extremely clear sinuses!

Then I just spread it out on a cookie sheet and pop it in the freezer.  When it’s frozen, I transfer it to a freezer bag and put it back in the freezer.  It’s ready to use by the spoon-full, whenever I need it!

BENEFITS:

  • Having horseradish without preservatives
  • Raising your own
  • The “secret ingredient” in my potato salad

Jars of prepared horseradish are about $3.50 each and I have enough for about 3 jars worth.

MONEY SAVED:  $10.50

🙂